QuickBooks Data Sync

This comprehensive document will walk you through the step-by-step configuration process for QuickBooks data sync and address its specific use cases.
Supported Objects
Byteline supports syncing the following data objects from QuickBooks:
- Customers
More object types will be supported in the future.
Standard Data Sync functionality
Please refer to Data Sync - Getting Started for the standard data sync functionality. The getting started document covers usages of data sync features valid for all integrations.
Installing app
- Go to QuickBooks Marketplace
- Search for "Byteline Sync"
- Select the app and click on the "Get app now" button.

- After installing the app, refer to the next section on configuring a data sync.
Configuring QuickBooks Data Sync
Step 1: Start the Sync Setup
- Log in to your Byteline account and navigate to the My Syncs page.
- Click on the "Create Sync" button to begin the configuration.
Step 2: Select QuickBooks as your first app
- Choose QuickBooks as the first app to sync. Alternatively, you can select another app first and then pick QuickBooks as the second app.
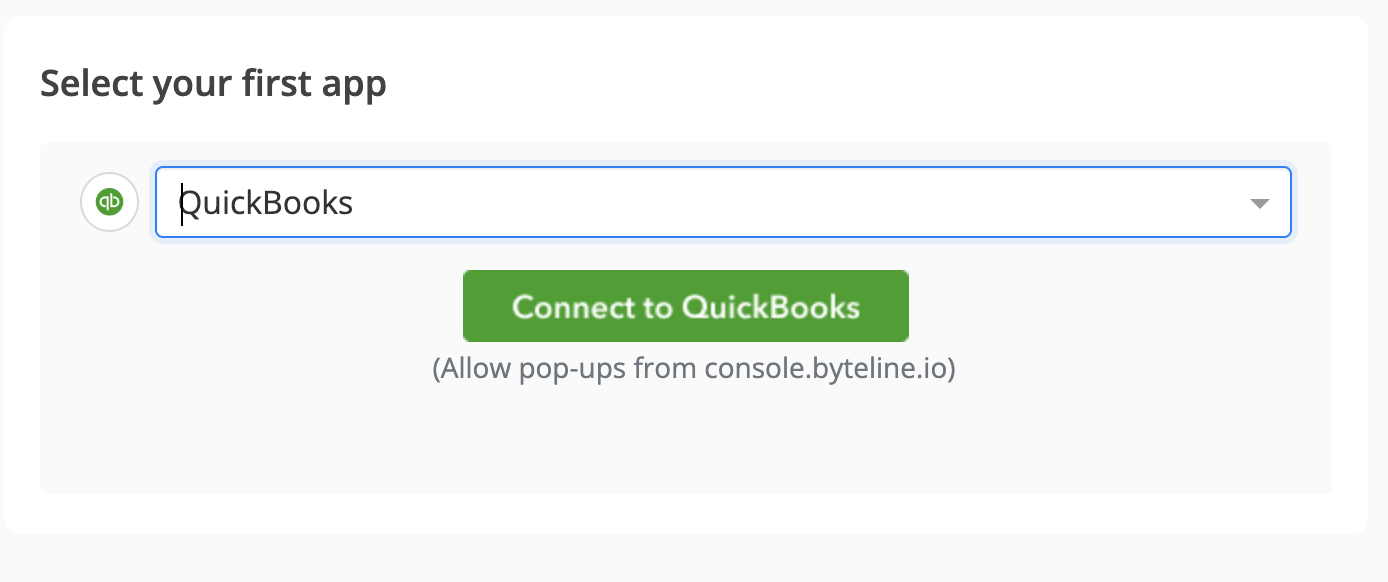
- Click on "Connect to QuickBooks" button to connect your QuickBooks account to Byteline.
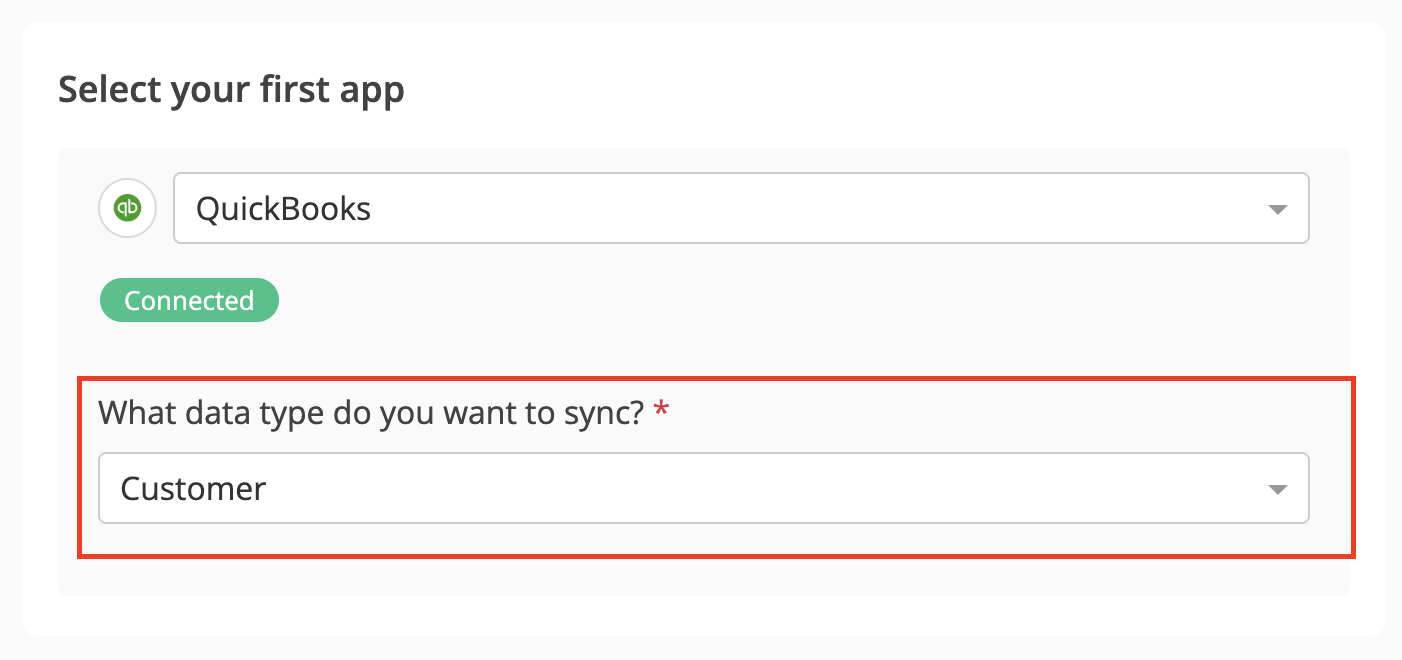
Step 3: Choose QuickBooks Data Type
- Select the QuickBooks data you wish to sync. Byteline supports the following:
* Customers
Step 4: Connect the Second App
- Select the second app for syncing and log in to authorize the connection.
- Once connected, click "Continue" to move to the table mapping screen.
Step 5: Map Tables Between QuickBooks and the Other App
- Select the tables to sync between both apps. For all QuickBooks objects, you’ll see a single table available in the dropdown menu.
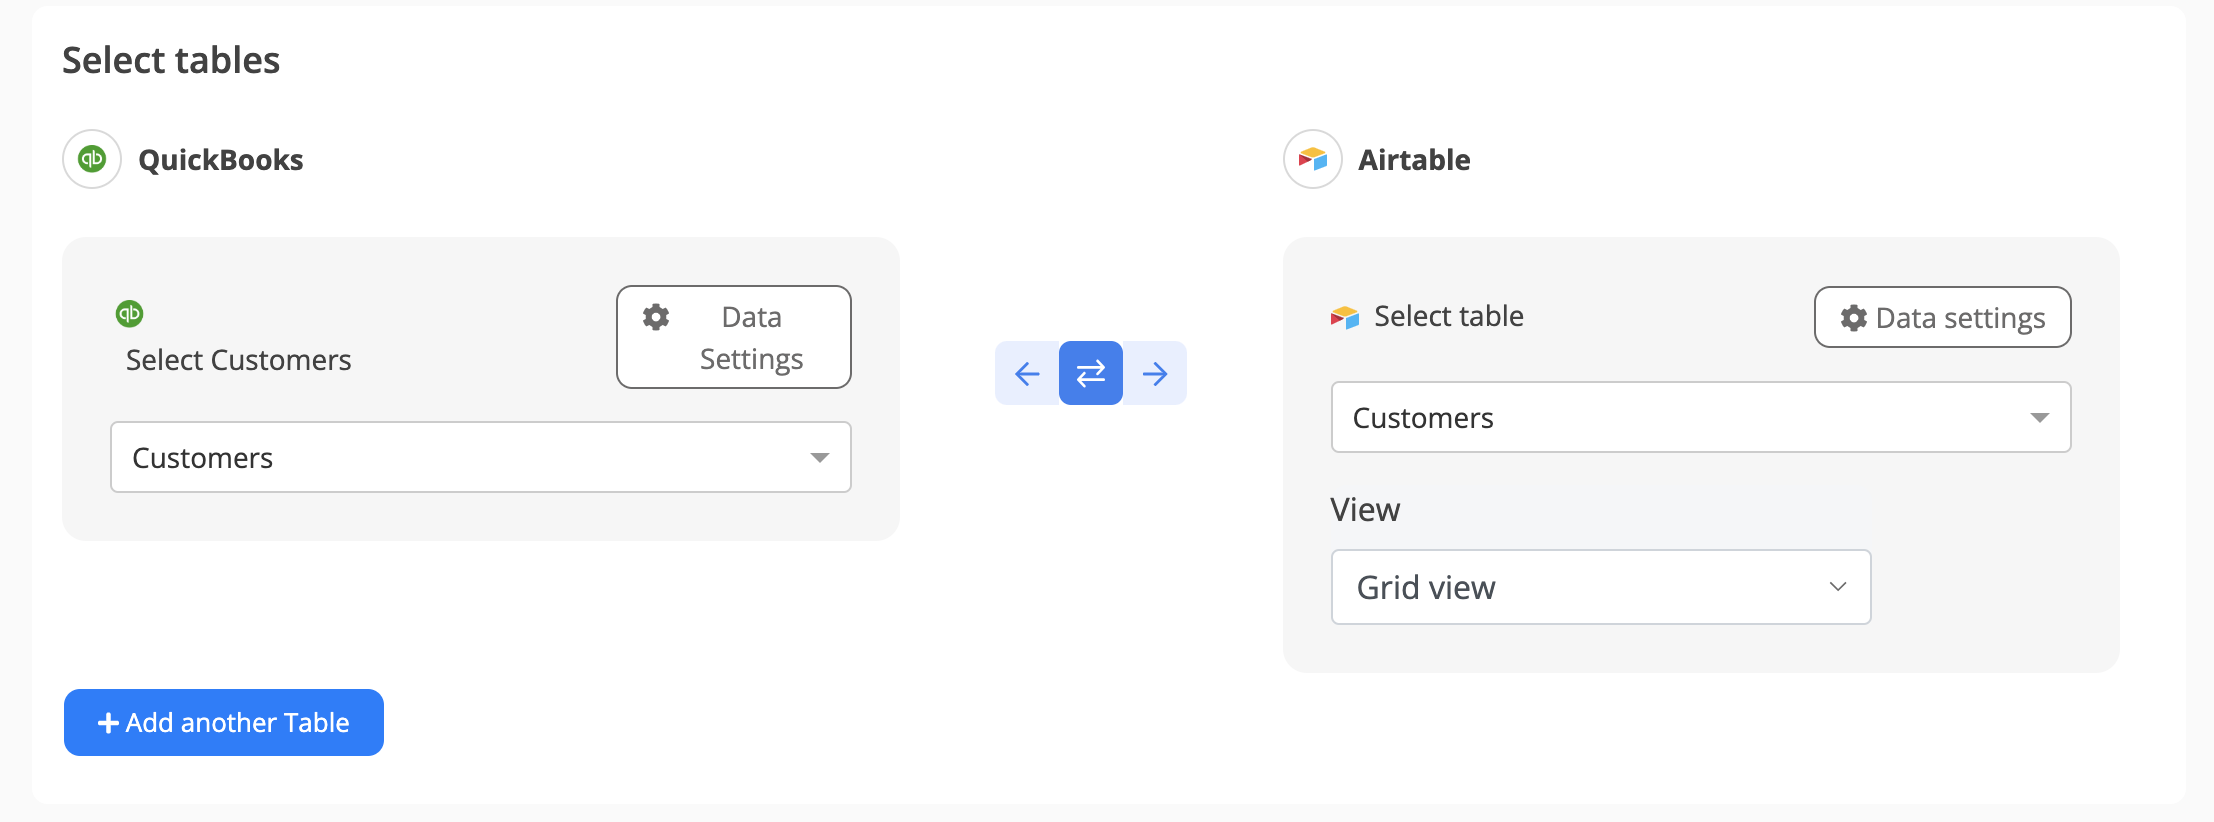
- Select the tables you want to sync between the two apps.
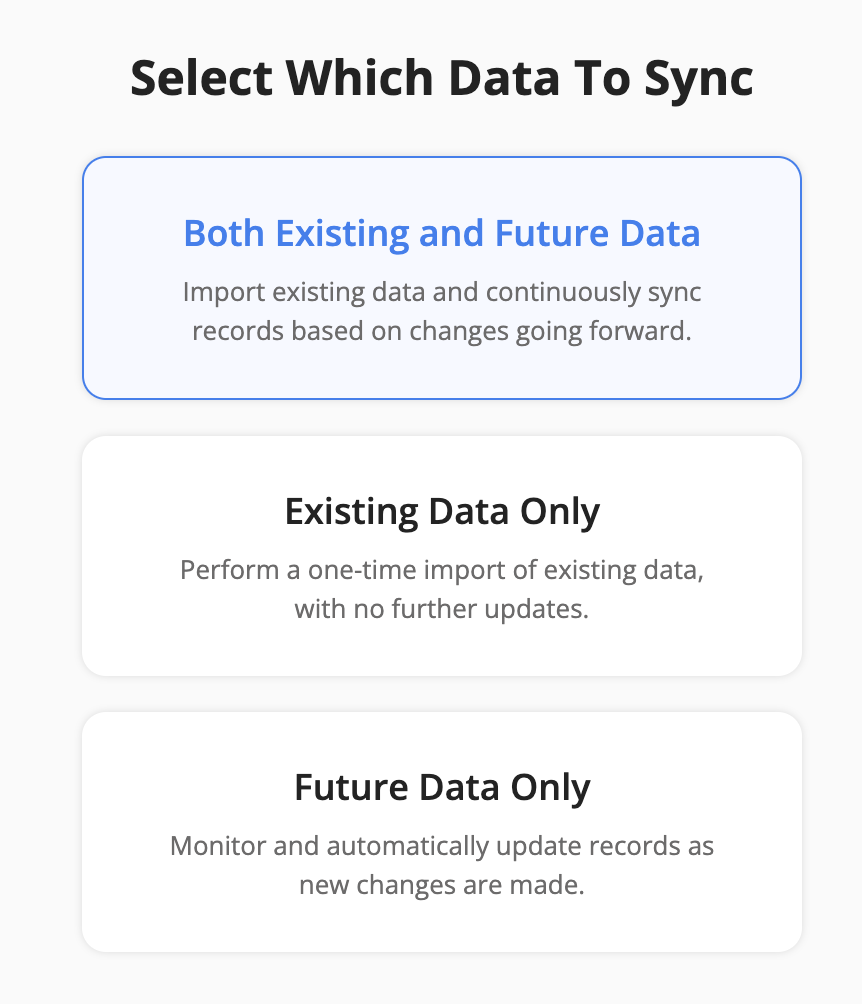
Step 6 - Select Which Data to Sync
Step 7: Configure Field Mapping
- On the Field Mapping screen, drag and drop fields from the right panel into the mapped fields column to create mappings.
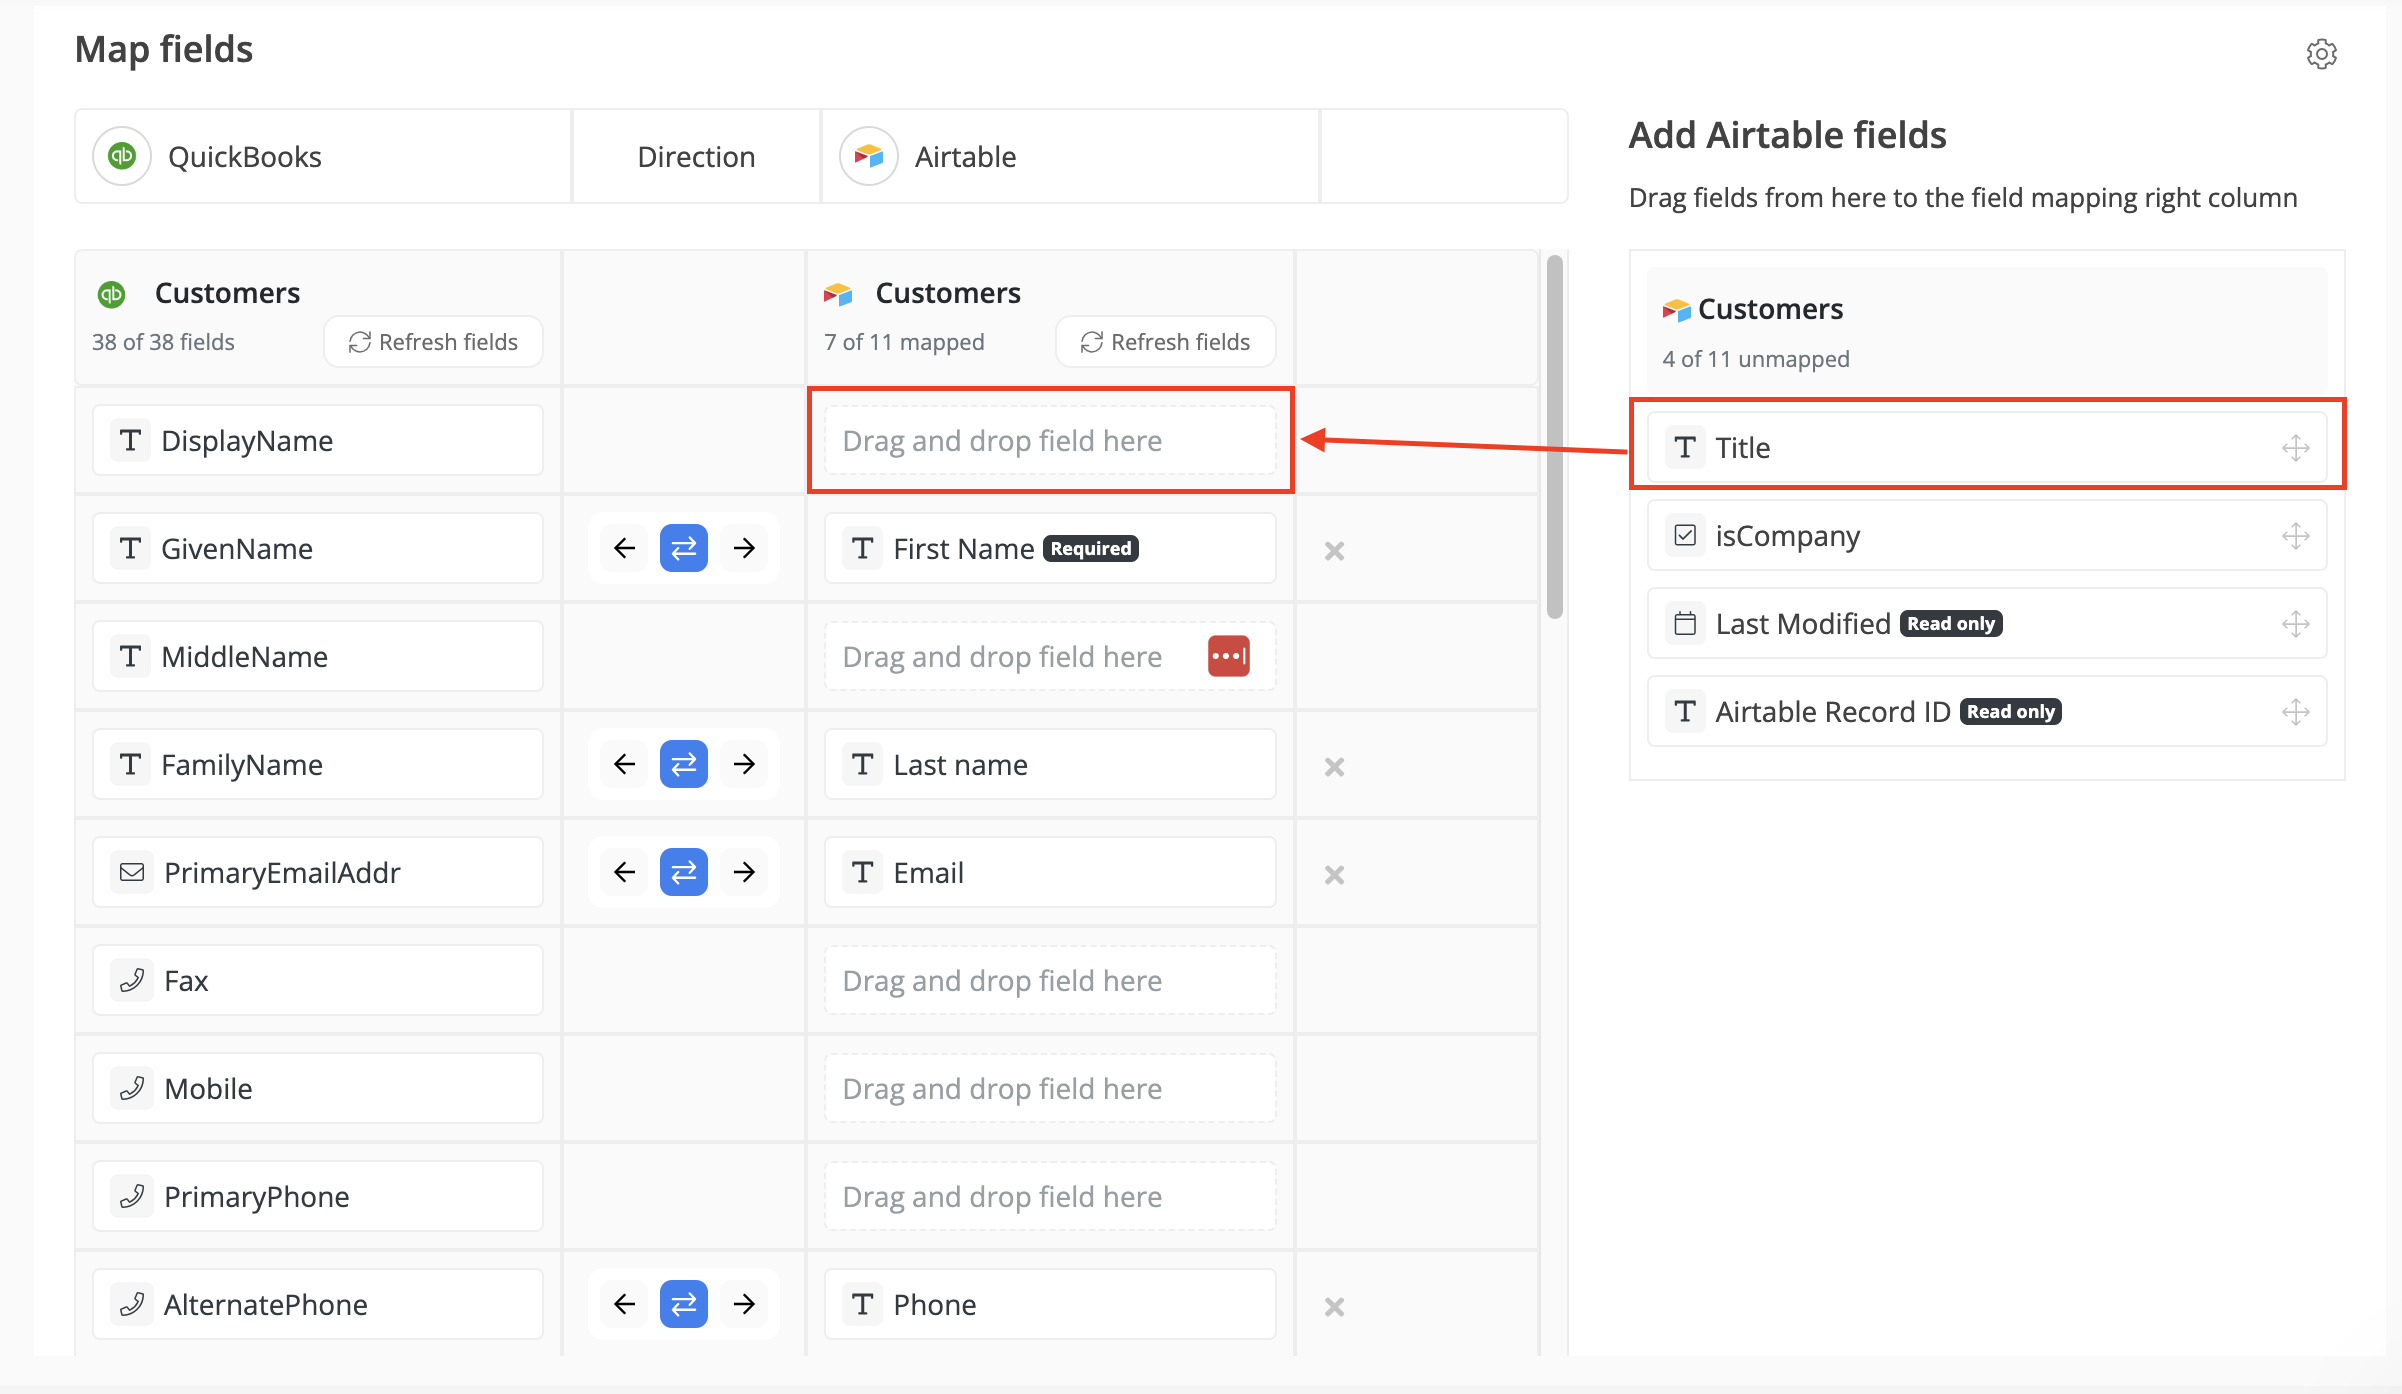
- To delete a mapping, click the X button next to the field.
- Select the sync direction at the field level using the arrow buttons.
1-Way Sync: Data flows from one app to the other.
2-Way Sync: Data flows bidirectionally between both apps. - Once your mappings are finalized, click "Continue."
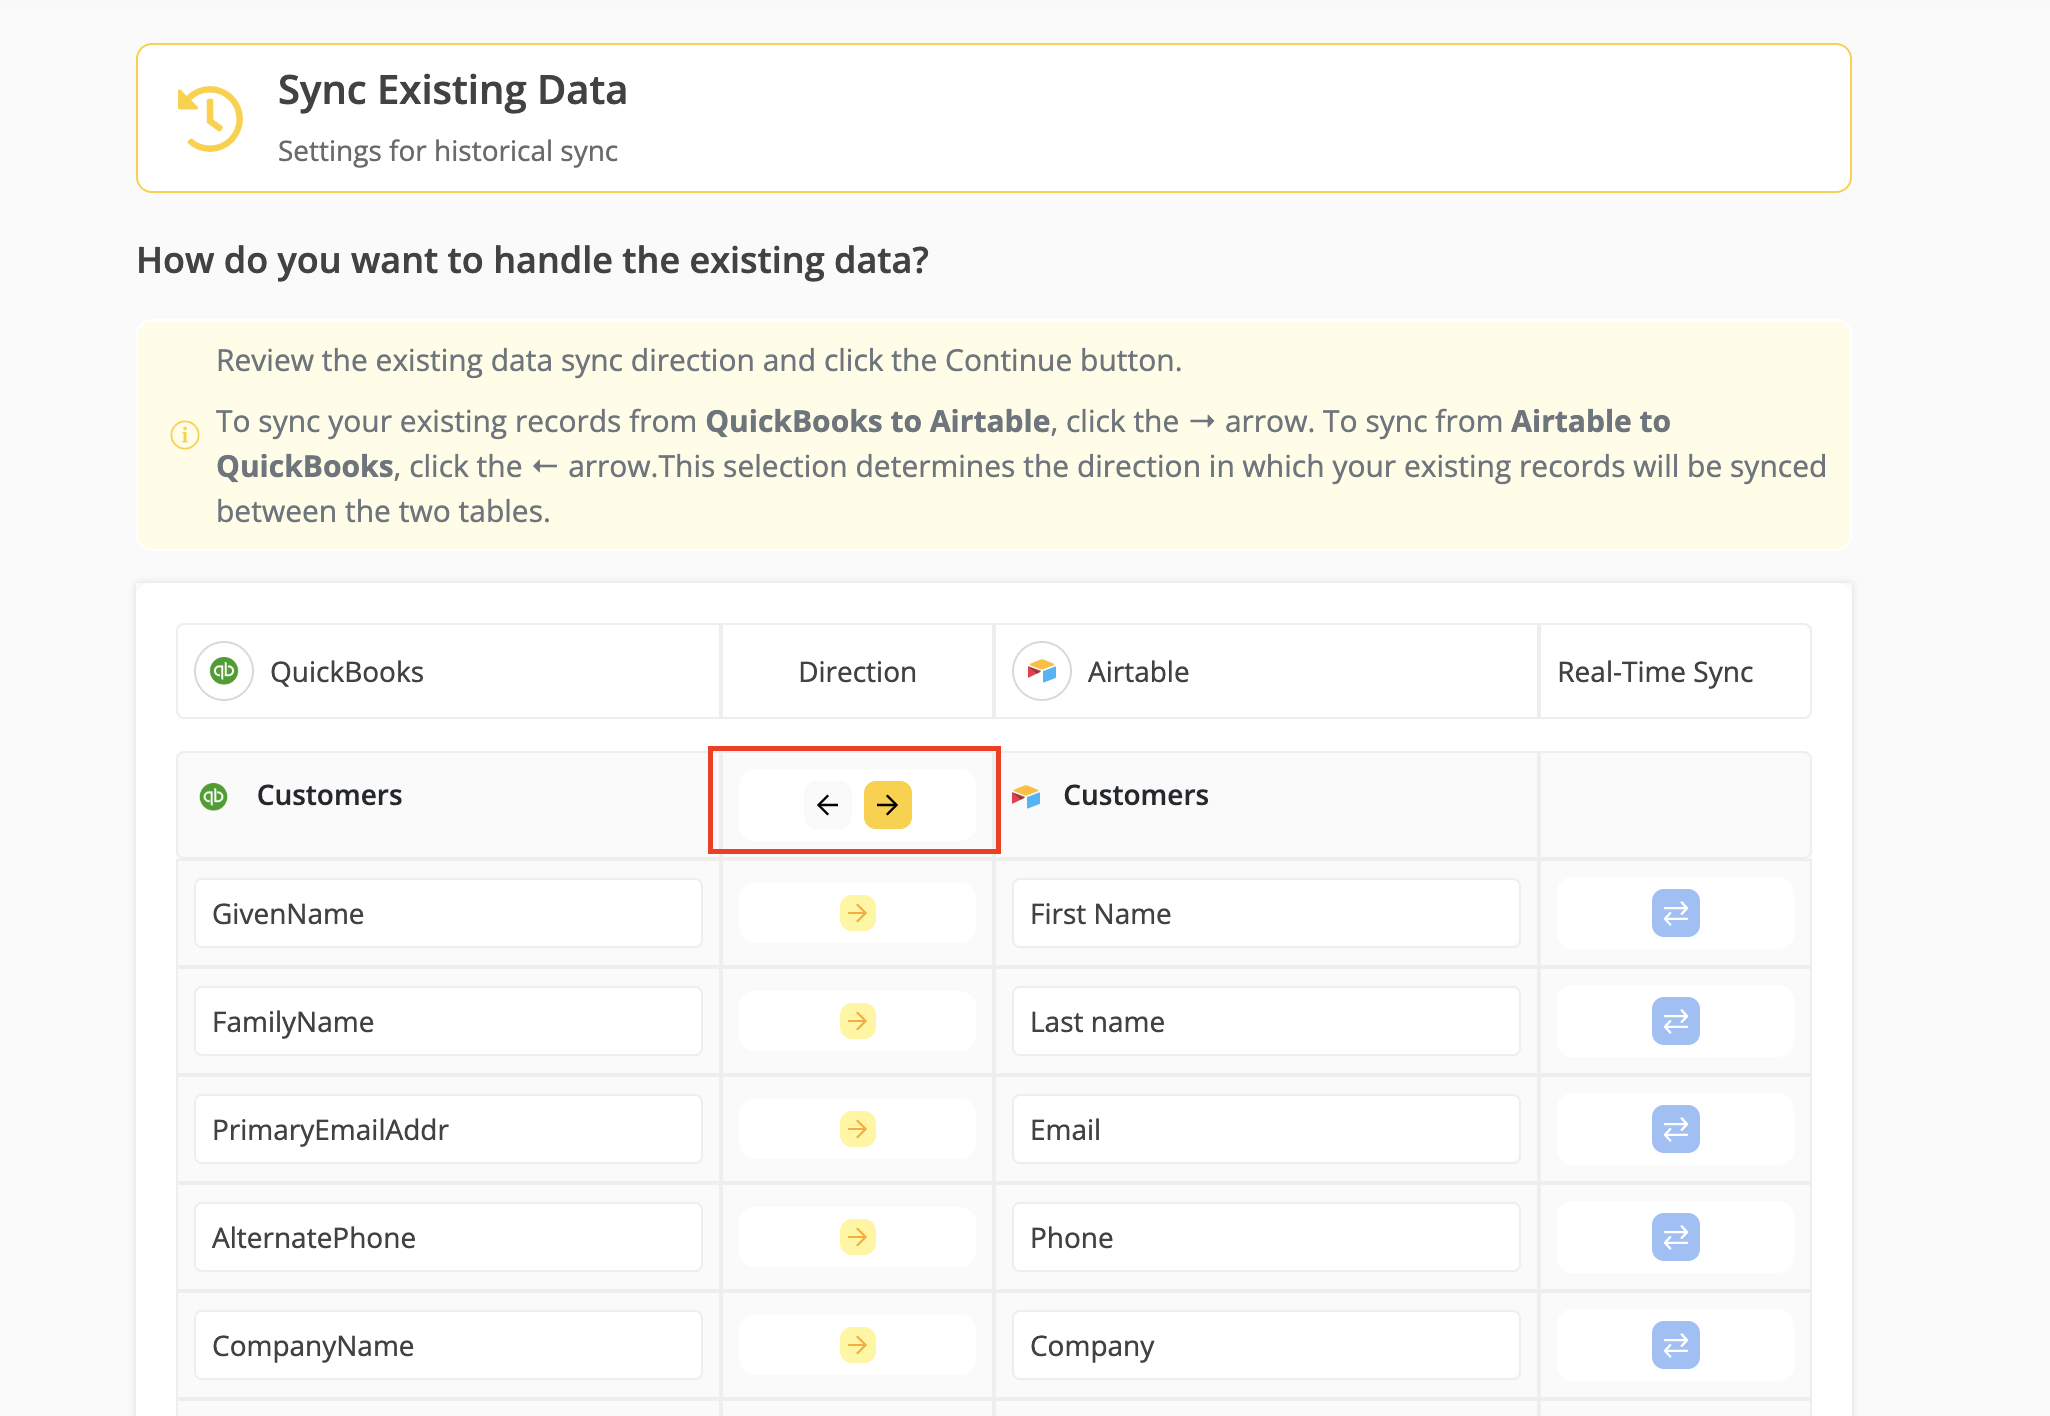
Step 7: Sync Existing Data Configuration
- Select the sync direction for your existing data:
Step 8: Review Sync Preview
- Preview the sync setup to ensure everything is configured correctly.
- If all looks good, click "Start Sync."
- Byteline will sync your existing data and make the sync live.
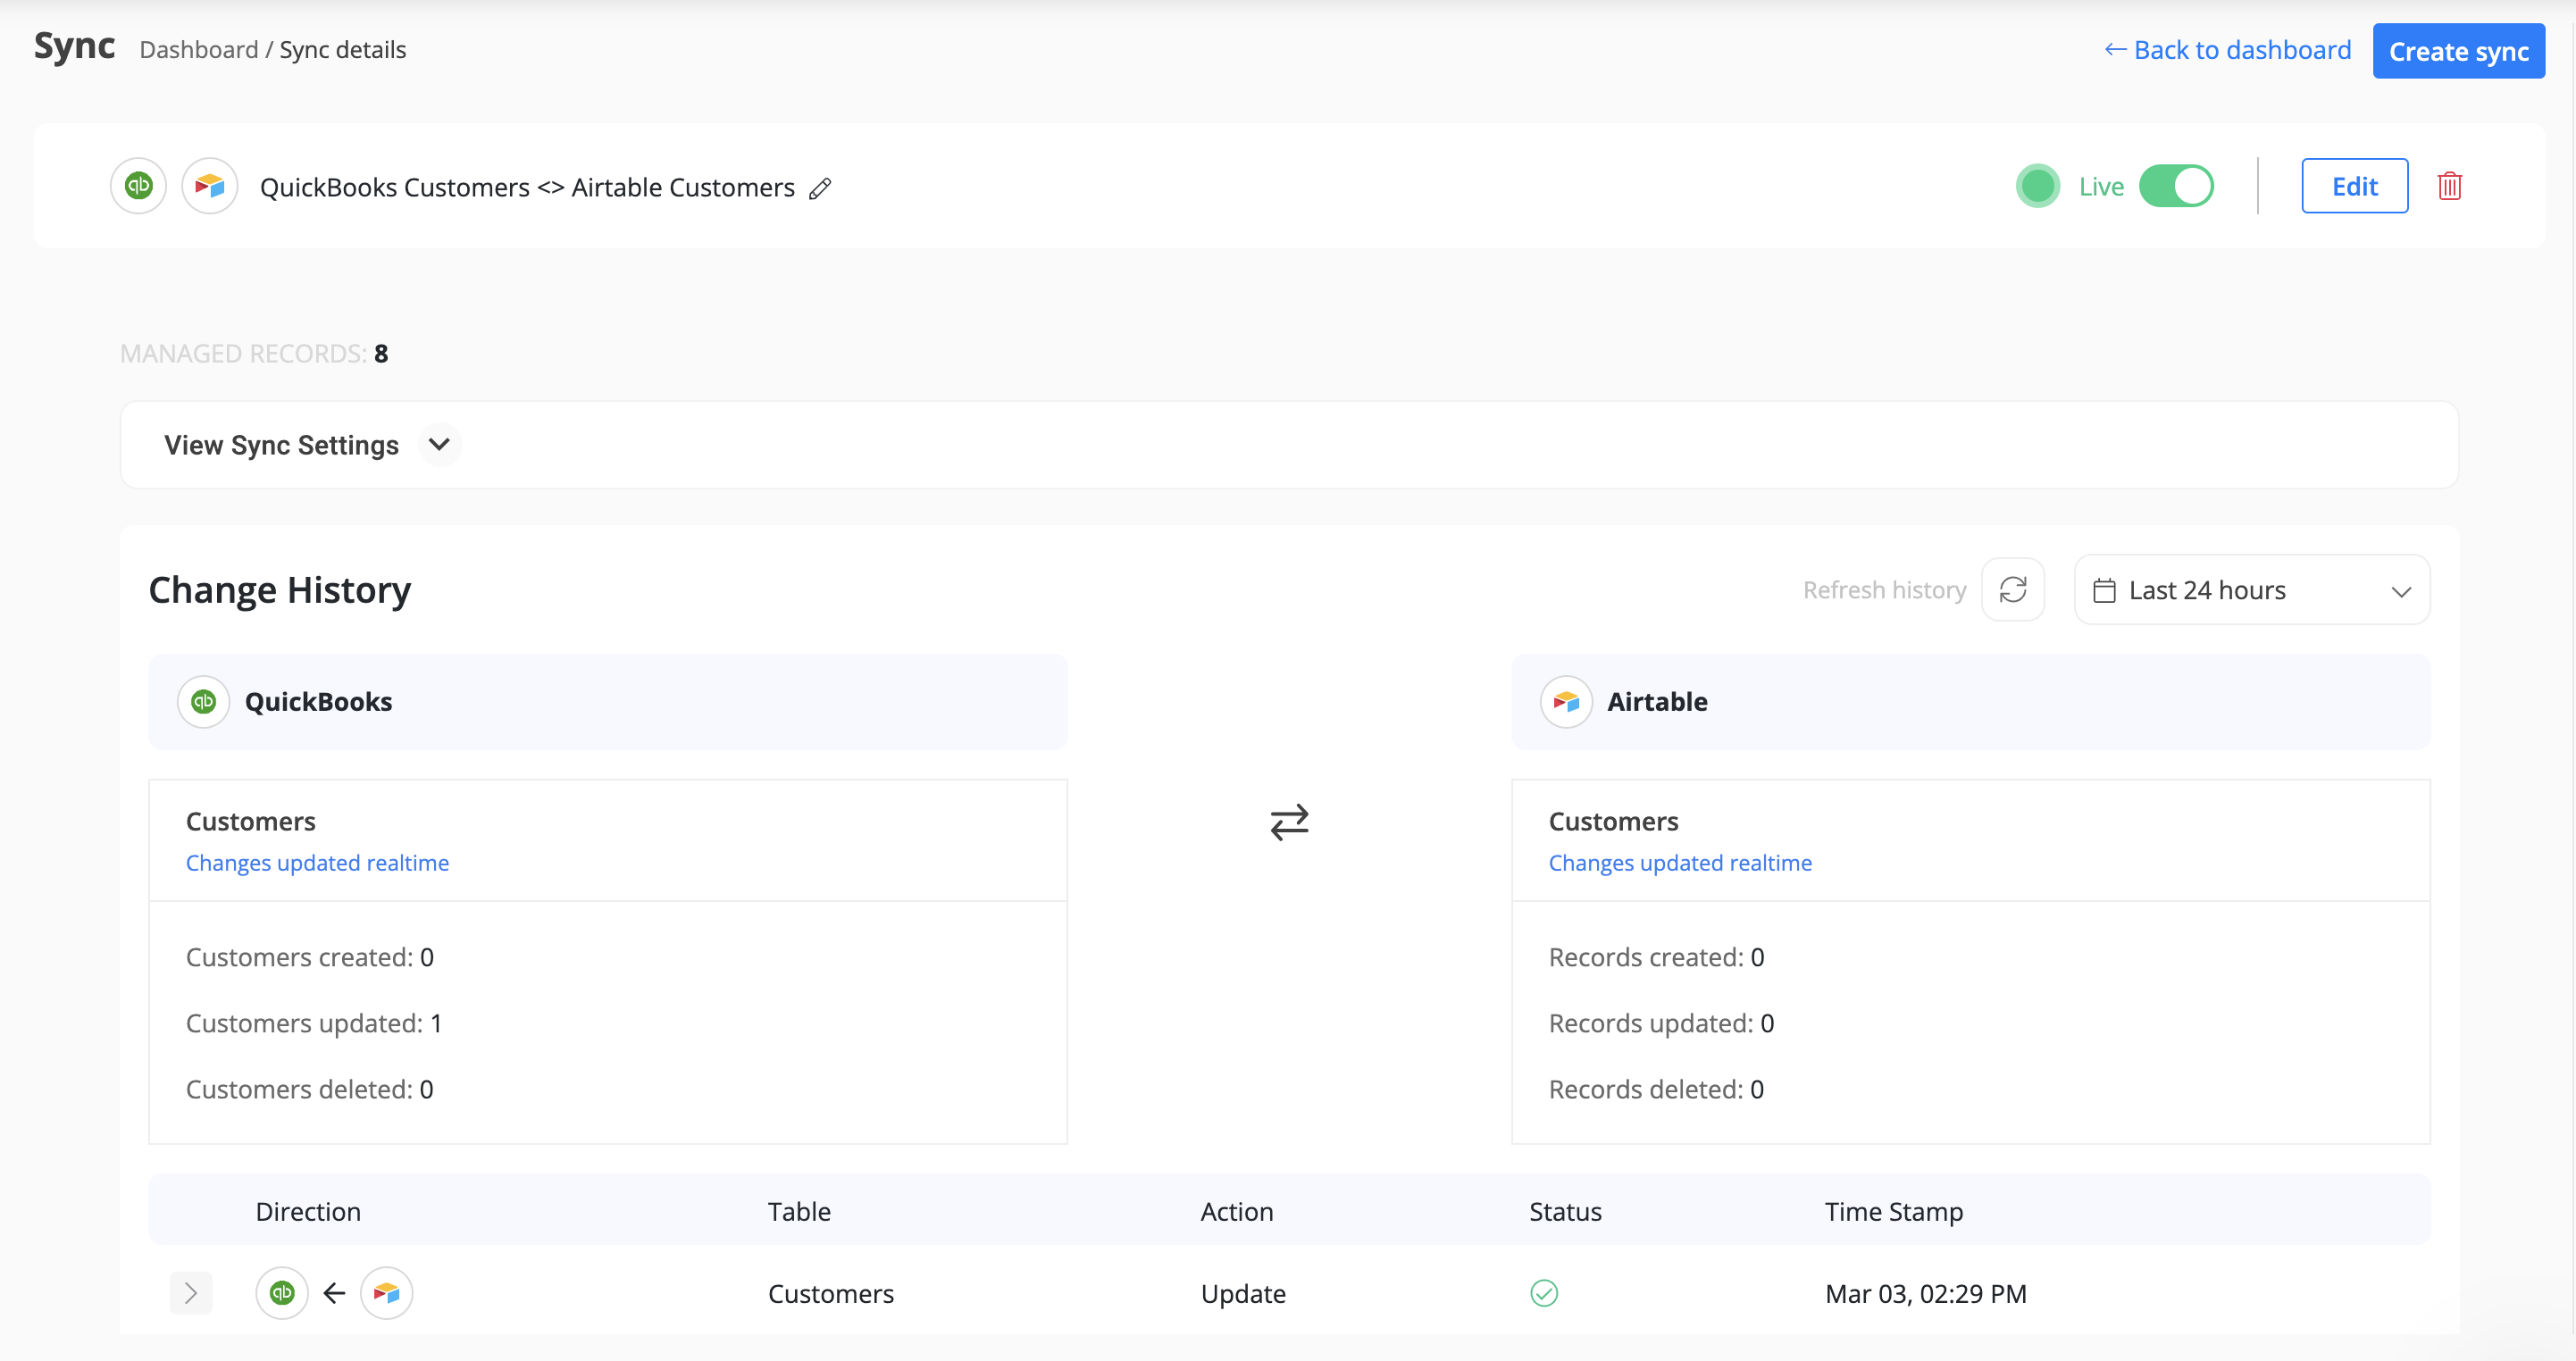
Step 9: Automatic Record Syncing
Once the sync is live, any changes made to records in either app will automatically sync to the other app in real time.
Why Use Byteline for QuickBooks Data Sync?
Byteline simplifies the process of syncing data between QuickBooks and other apps, ensuring:
- Real-time data synchronization.
- Easy-to-use field mapping and sync direction configuration.