PostgreSQL Data Sync

This comprehensive document will walk you through the step-by-step configuration process for PostgreSQL data sync and address specific use cases tailored to PostgreSQL .
Pre-requisites
Your PostgreSQL tables must have a primary key column. If you don't have it, please refer to the section below on adding it.
Standard Data Sync functionality
Please refer to Data Sync - Getting Started for the standard data sync functionality. The getting started document covers the usage of data sync features valid for all integrations.
Configuring PostgreSQL Data Sync
Step 1: Start the Sync Setup
- Log in to your Byteline account and navigate to the My Syncs page.
- Click on the "Create Sync" button to begin the configuration.
Step 2: Select PostgreSQL as Your First App
- Choose PostgreSQL as the first app to sync.
Alternatively, you can select another app first and then pick PostgreSQL as the second app.
- Click on the "Sign In" button under PostgreSQL to connect it to Byteline.
- Now select the PostgreSQL schema that you want to use.
Step 3: Connect the Second App
- Select the second app for syncing and log in to authorize the connection.
- Once connected, click "Continue" to move to the table mapping screen.
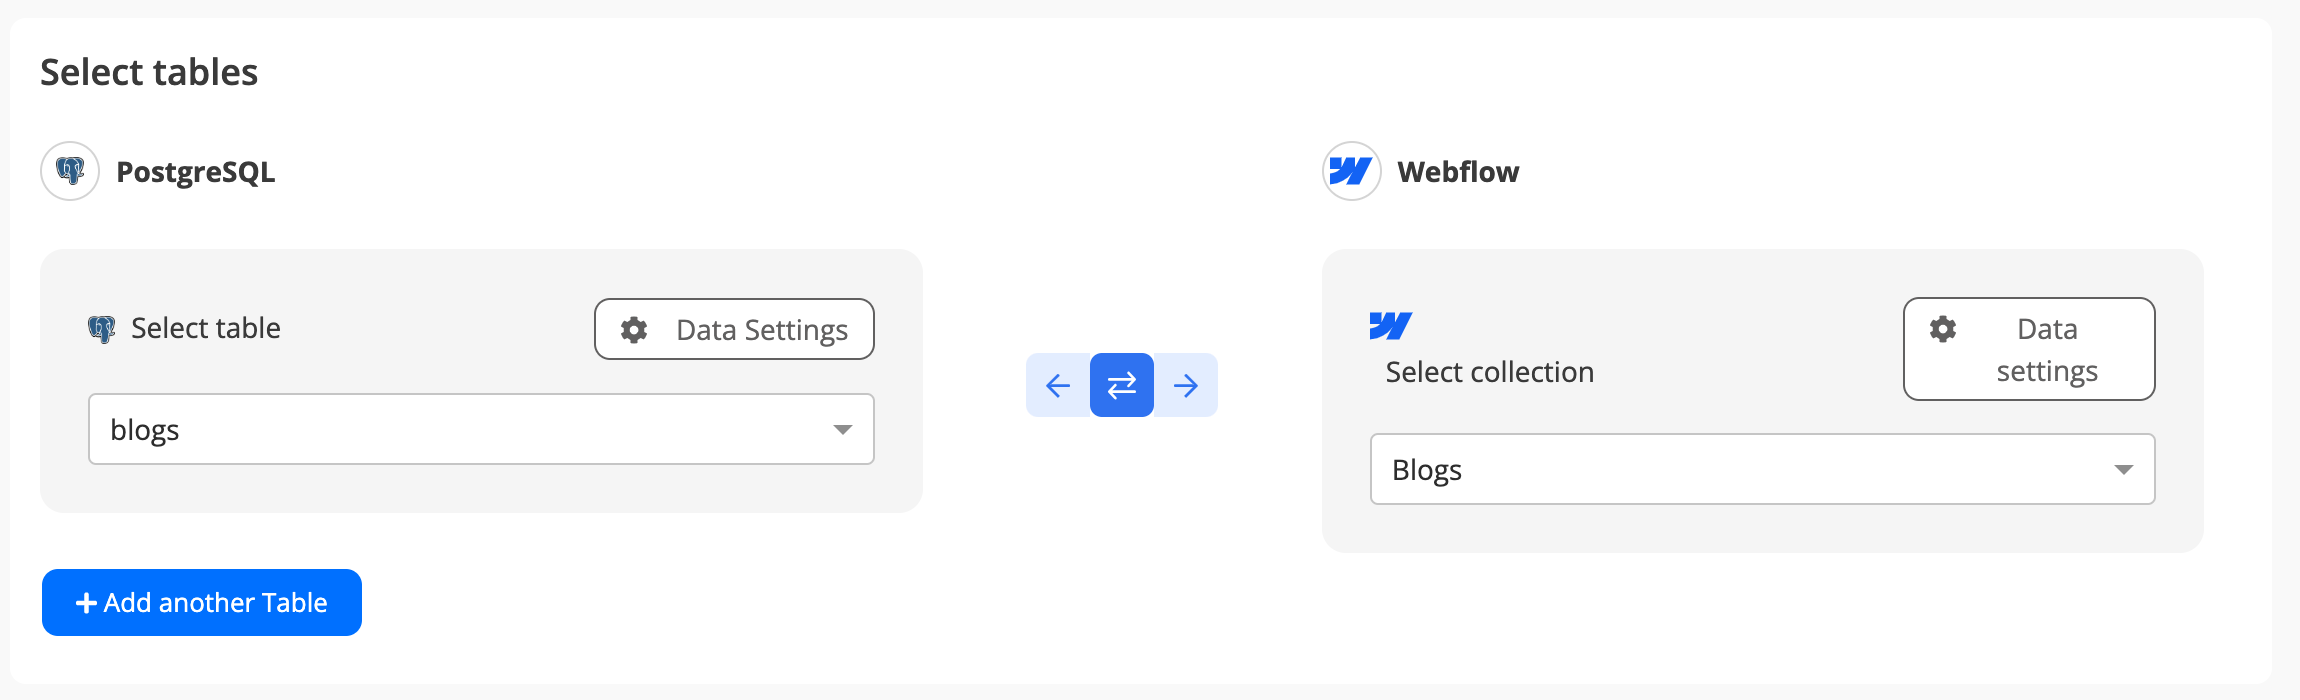
Step 4: Map Tables Between PostgreSQL and the Other App
- Select the tables you want to sync between the two apps.
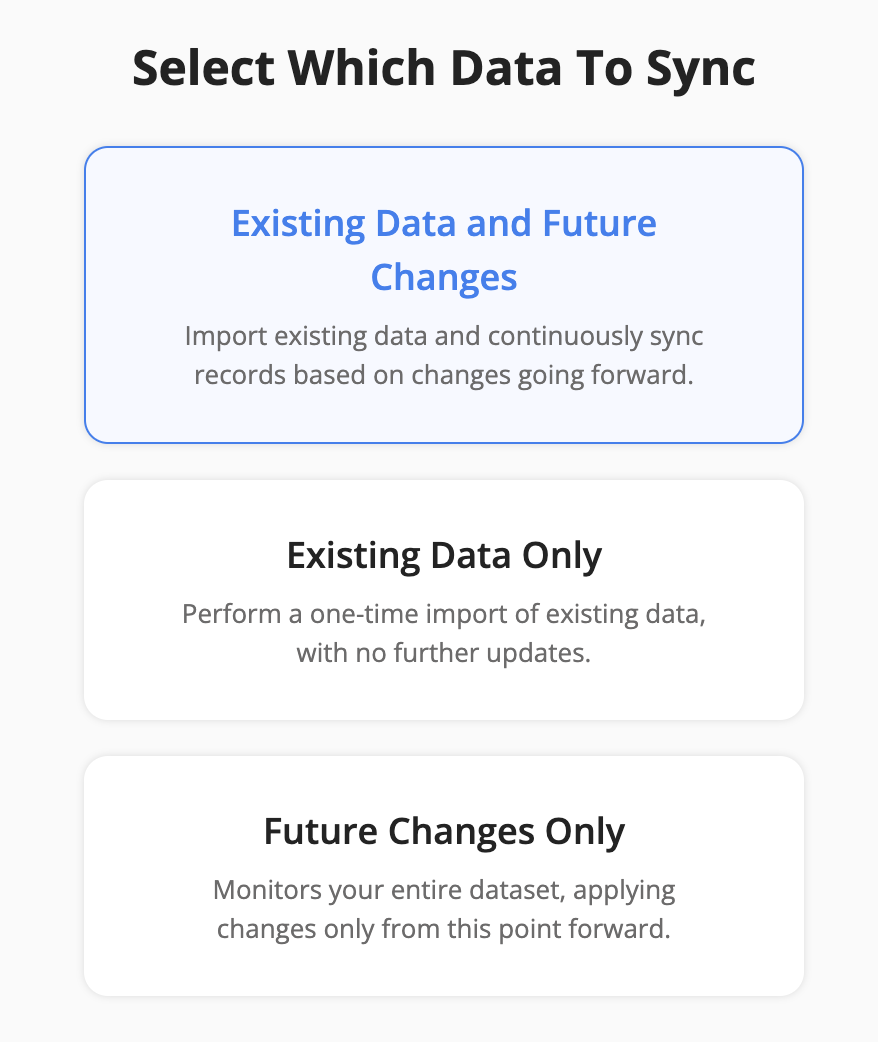
Step 5: Select Which Data to Sync
Step 6: Configure Field Mapping
- On the Field Mapping screen, drag and drop fields from the right panel into the mapped fields column to create mappings.
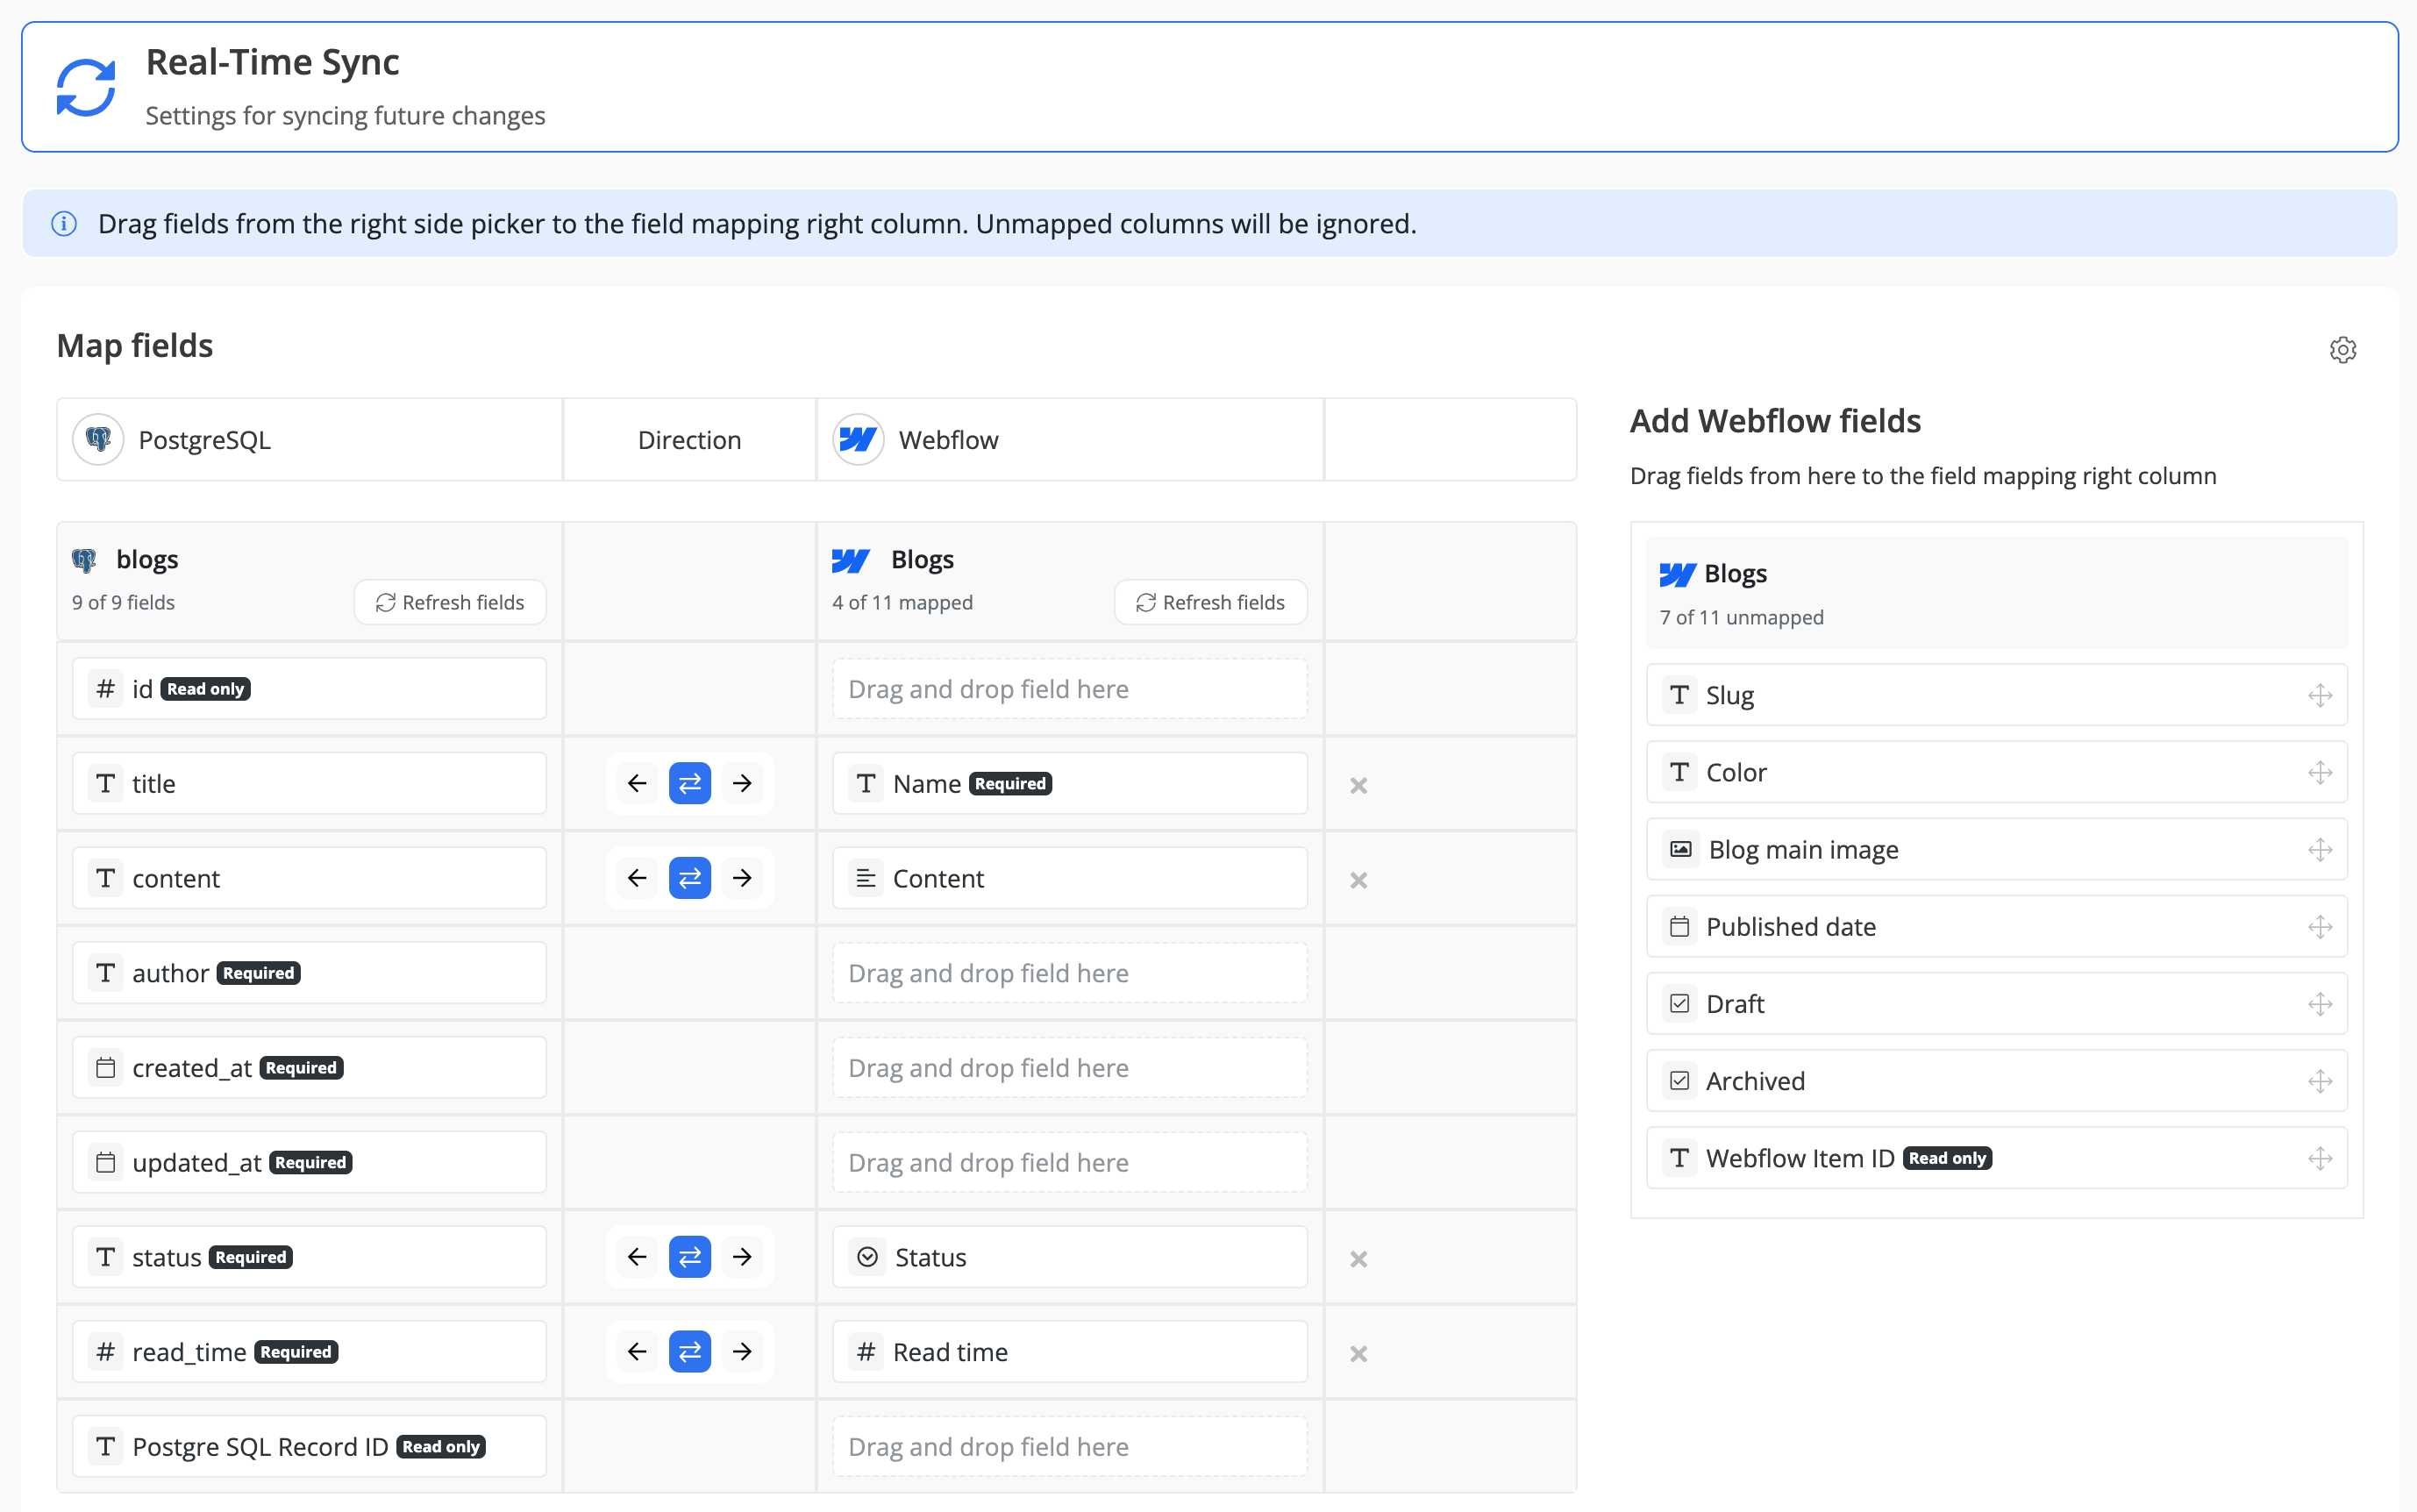
- To delete a mapping, click the X button next to the field.
- Select the sync direction at the field level using the arrow buttons.
One-Way Sync: Data flows from one app to the other.
Two-Way Sync: Data flows bidirectionally between both apps. - Once your mappings are finalized, click "Continue."
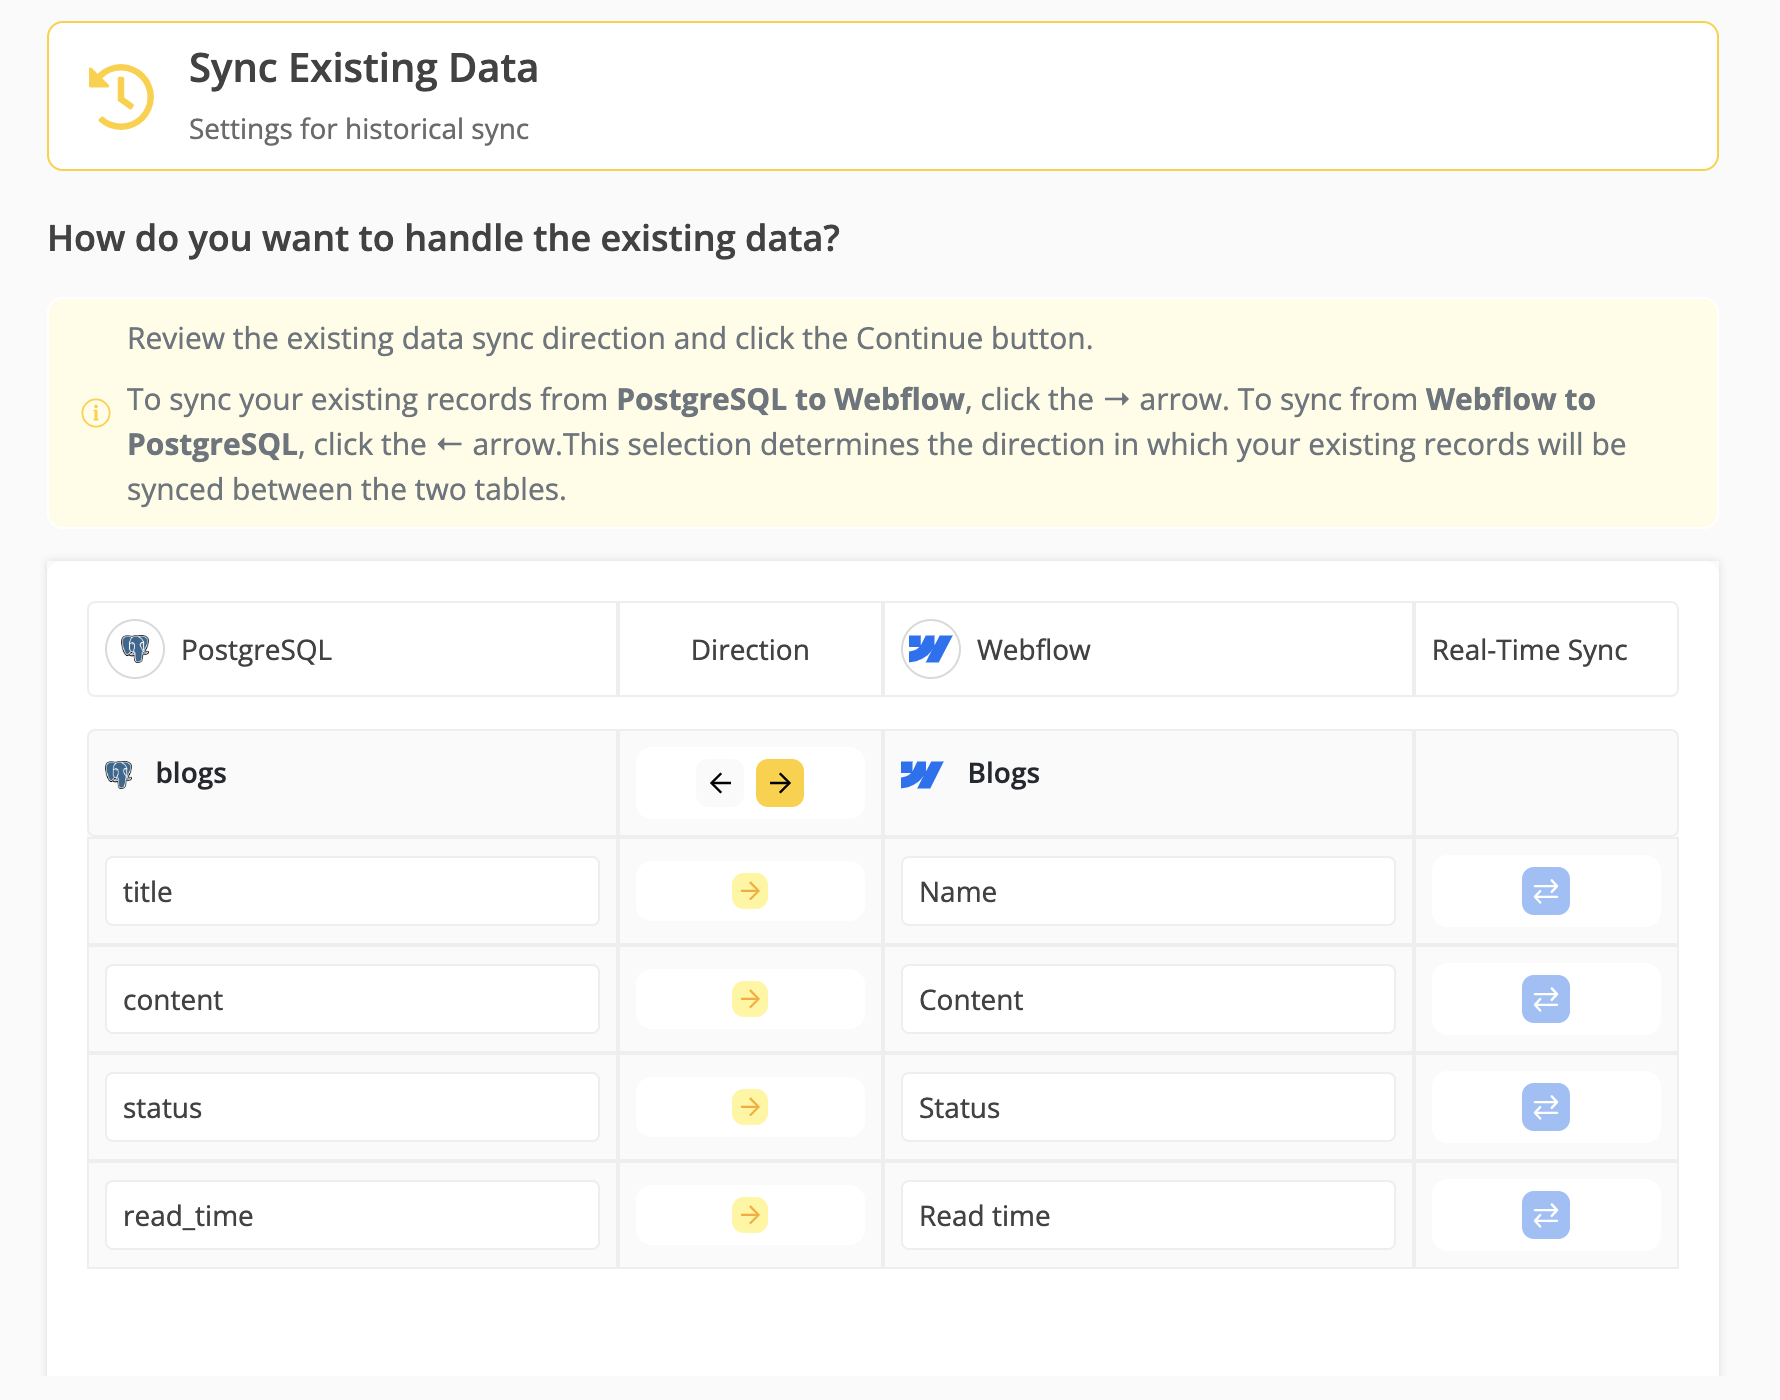
Step 7: Sync Existing Data Configuration
Select the sync direction for your existing data:
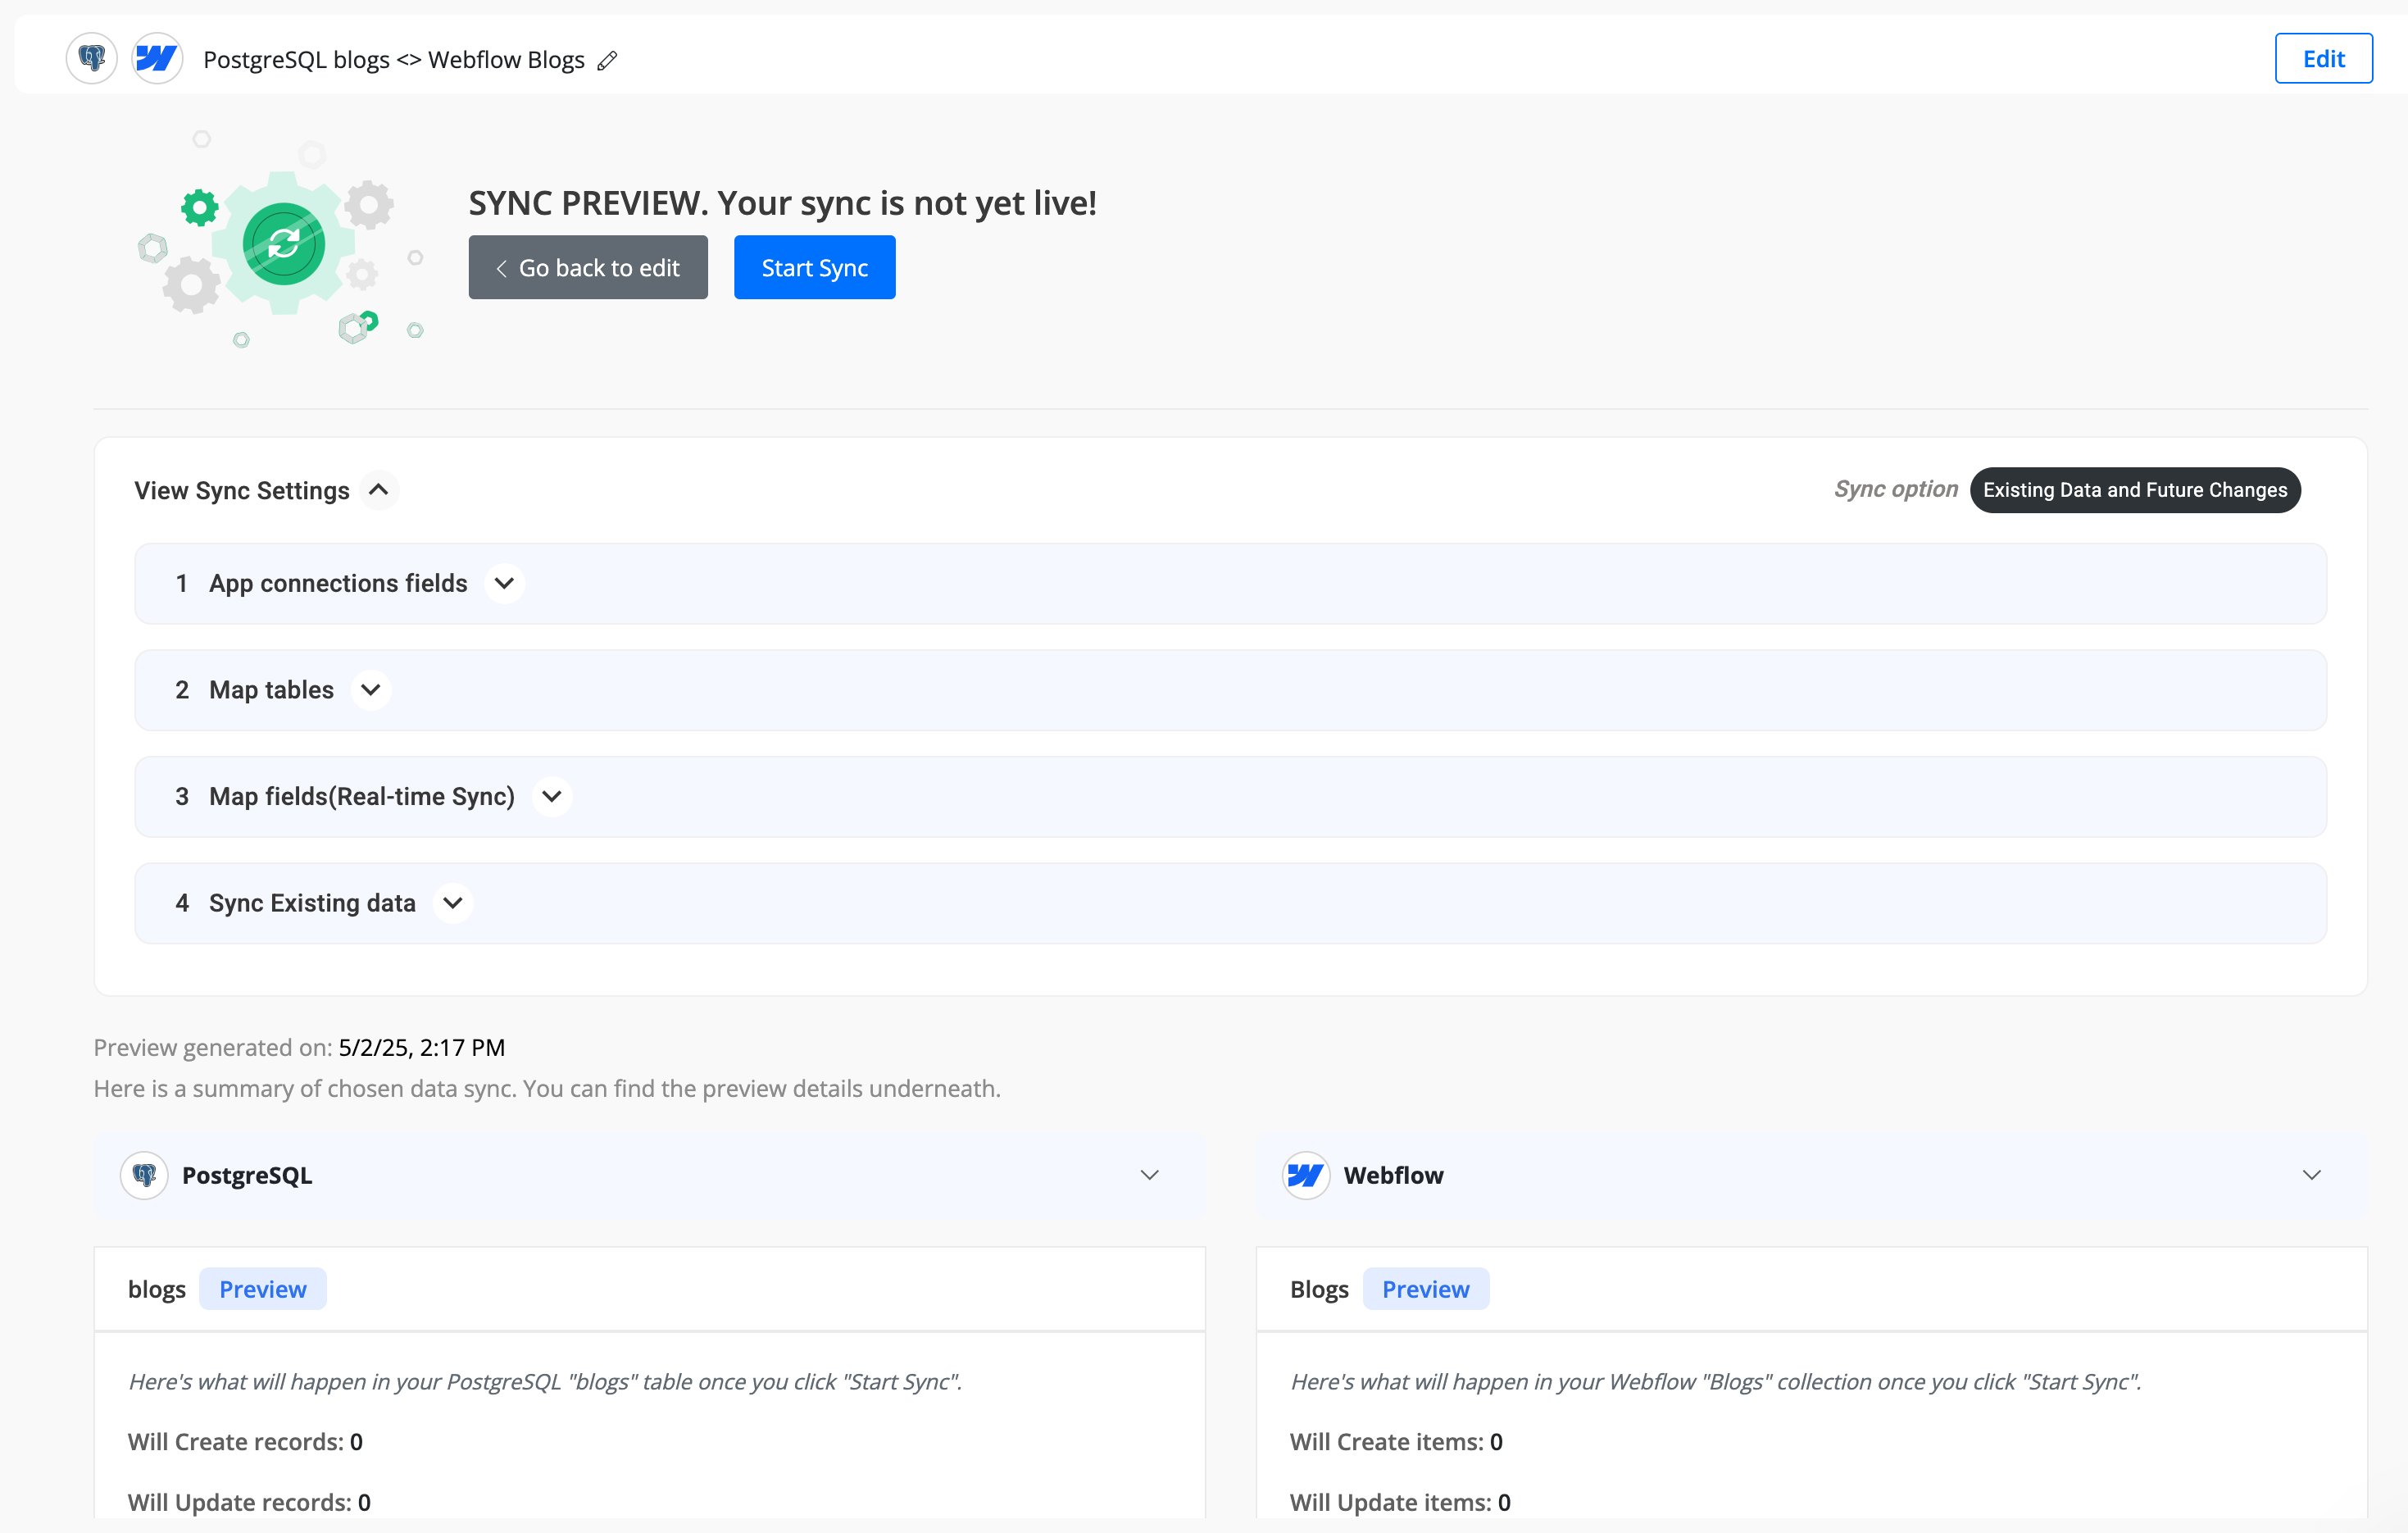
Step 8: Review Sync Preview
- Preview the sync setup to ensure everything is configured correctly.
- If all looks good, click "Start Sync."
- Byteline will sync your existing data and make the sync live.
Configuring a Primary Key for Your PostgreSQL Table
A primary key is required on a table for it to work with data sync. If your PostgreSQL table doesn’t already have a primary key, you can add one using either of the methods below.
Option 1: Add an Auto-Generated Primary Key (Recommended)
Use this method when your table doesn’t already have a suitable column for a primary key. Note: You have to complete steps 1 & 2.
Step 1: Add an identity column
ALTER TABLE blogs
ADD COLUMN id INT GENERATED ALWAYS AS IDENTITY;
Step 2: Add the primary key constraint
After ensuring that the ID column has been created and is unique:
ALTER TABLE blogs ADD PRIMARY KEY (id);
Option 2: Use an Existing Column as Primary Key
Use this method if you already have a column (like title, email, or user_id) that contains unique values.
⚠️ Important: The column you select must have unique and non-null values.
ALTER TABLE blogs ADD PRIMARY KEY (title);
Whitelisting IP Address for PostgreSQL Connections
To establish a secure and successful connection between your database and our data sync system, some hosting providers or firewall configurations may require you to whitelist our static IP address.
If your PostgreSQL database is hosted in a data center or cloud environment with IP restrictions, please ensure that the following IP address is allowed to connect:
➡️ IP to Whitelist: 3.21.72.72
Why is this needed?
Our data sync platform initiates the connection to your PostgreSQL database from the above IP. If your server blocks unknown IPs, whitelisting this address ensures that our sync operations can reach your database without interruption.
Ensure that the IP is whitelisted for port 5432 (the default PostgreSQL port), unless your database uses a different port.
⚠️ Note: If you are unsure how to whitelist an IP, please consult your database or hosting provider’s documentation or support team.
Once the IP is whitelisted, proceed with configuring the PostgreSQL connector in your data sync setup.
Syncing Data from localhost Using Ngrok
Usually, your database wouldn't be on the local machine. But if it is, and you want to sync data to or from it using Byteline, Ngrok can help expose your local database to the internet securely.
Steps to Access a Local Database Using Ngrok
1. Install Ngrok
Download and install Ngrok from https://ngrok.com/download. Follow the installation instructions provided for your operating system.
2. Expose Your Local Database Using Ngrok
Ngrok can expose a TCP connection for your local database. Use the following command to expose your database:
ngrok tcp <port>
Replace <port> with the port your database is running on (e.g., 5432 ).
Example for a PostgreSQL database running on port 5432:
ngrok tcp 5432
Ngrok will generate a public TCP address (e.g., 0.tcp.ngrok.io:12345) that tunnels to your local database.
3. Update Database Configuration in Byteline
In the Byteline data sync configuration, use the Ngrok TCP address as the database host. For example:
Host: 0.tcp.ngrok.io
Port: 12345
Username: Your database username
Password: Your database password
Database Name: The name of your database
4. Test the Connection
Use the "Test Connection" feature in Byteline to ensure the platform can connect to your local database through the Ngrok TCP tunnel.
5. Run the Sync
After successfully testing the connection, initiate the data sync as you normally would. Byteline will access your local database through the Ngrok tunnel.